
But first and foremost- I wanted to thank everyone for all the emails, comments and questions! I have enjoyed reading and answering them all! It always makes me smile to know that something I created is liked by others!
The plastic ornaments that I used were purchased at Michaels. They are 70mm BUT they do not have any marking on the packaging that state that they are 70mm. The ornaments are NOT available from Michaels.com. You actually have to go to the store to get them. If you do go to the store- look for the ornaments that are priced $1.29 and look like the picture below.

The ornaments also come with a little tab at the top. Carefully cut the tab off using Paper Snips. You won't be able to see where the tab used to be as the ribbon covers the mark up.

To create the mini penguin- you will need the following supplies:
Basic Black Card Stock
Whisper White Card Stock
Real Red Card Stock
Pumpkin Pie Card Stock
Big Shot
Many Mittens Framelits
Fox Builder Punch
Paper Snips
Adhesive of your choice (I prefer Multipurpose Liquid Adhesive)
Please note that this little cutie was originally created by Donna Griffith from the Stampin' UP! Home Office. Another demonstrator shared the picture tutorial and I just created my own from there.
Below is a mini tutorial on how to create a penguin of your own. Just for future reference- there is a larger mitten in the Many Mittens Framelits that can be used to create a larger penguin! You just have to freehand the feet and nose!
Step 1:
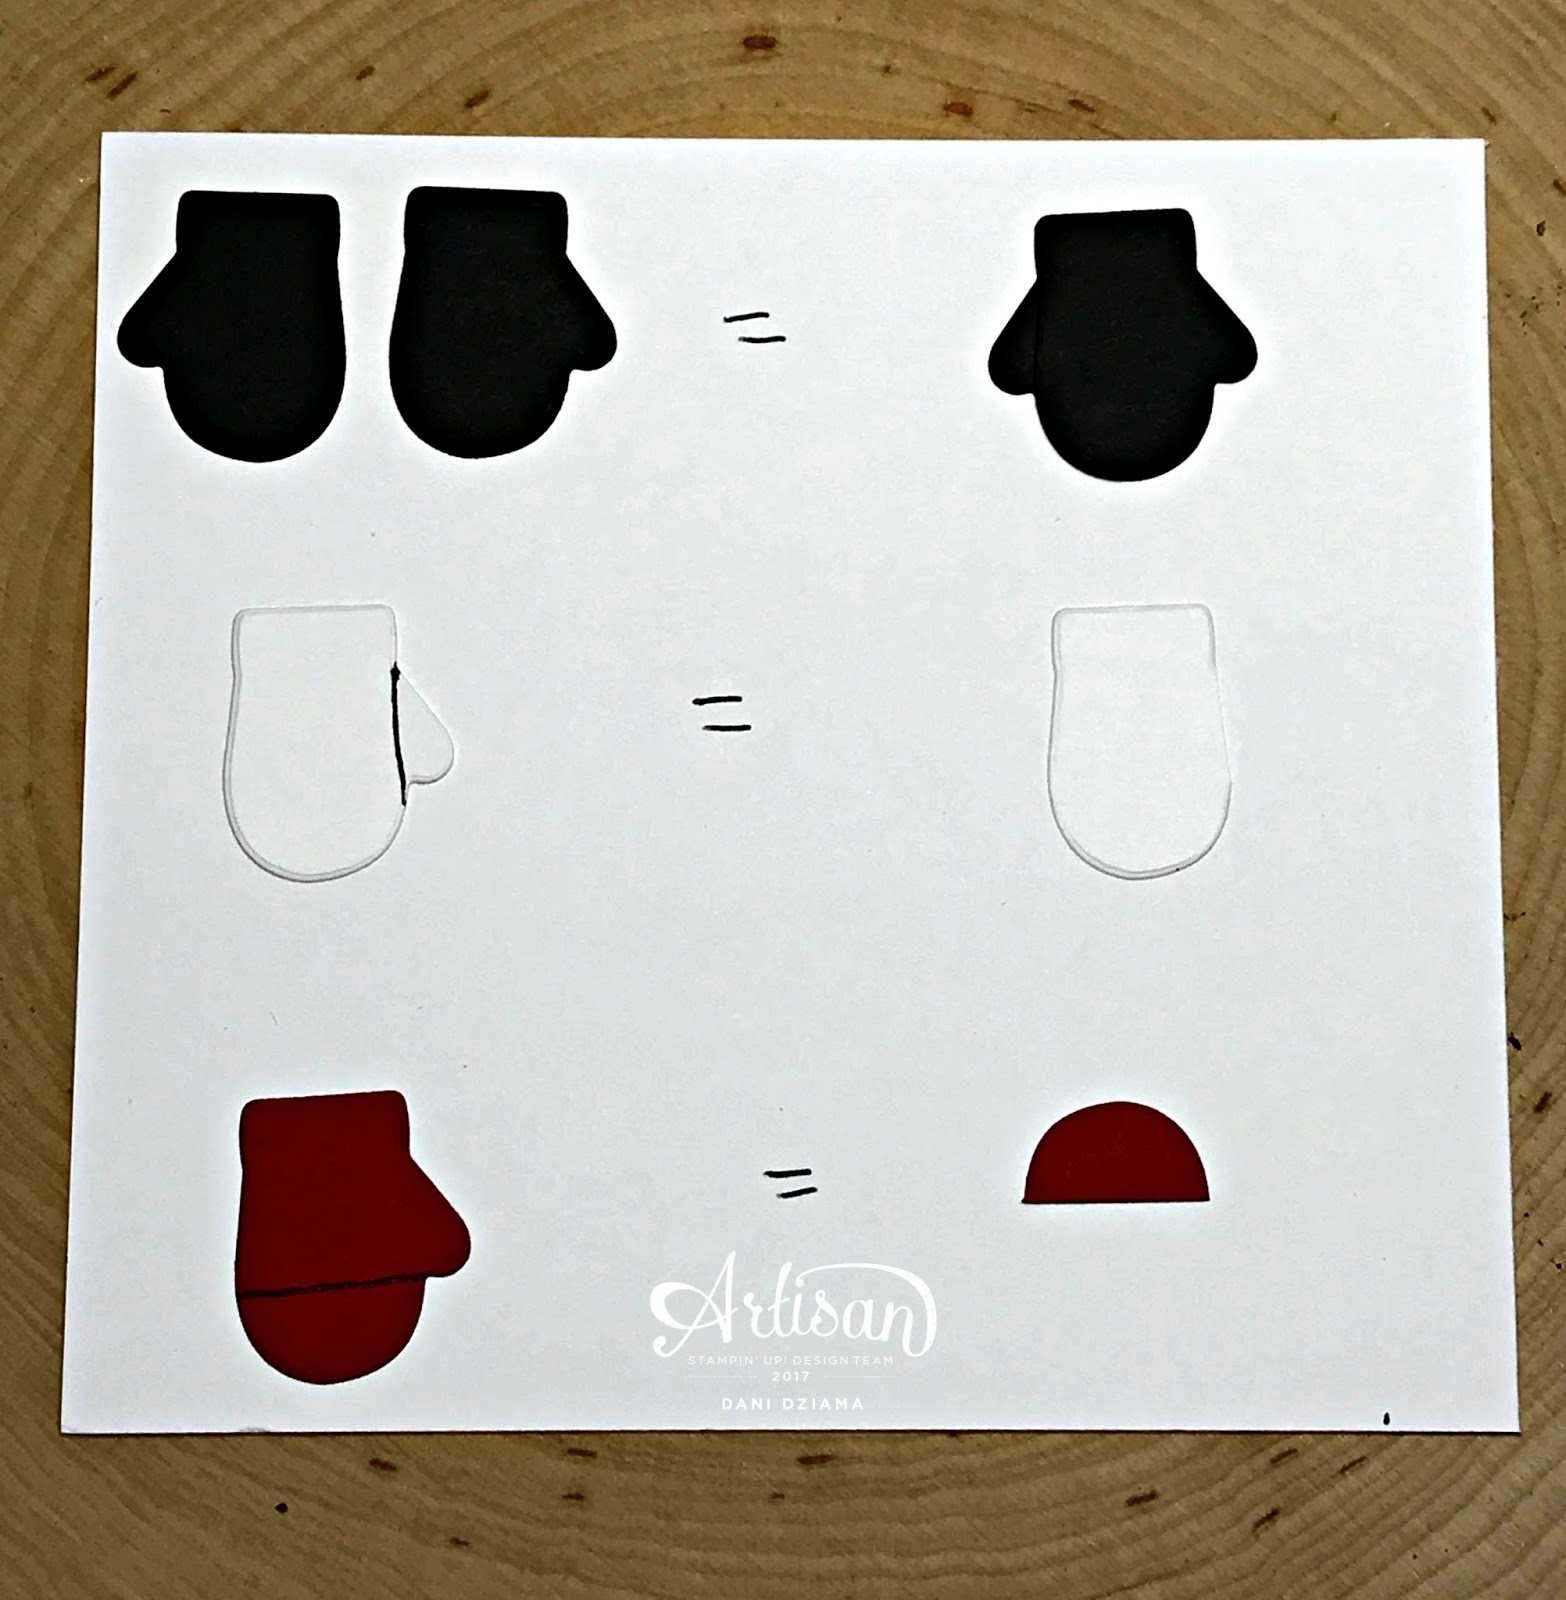
Step 2:

Step 3:

After your penguin is assembled- the only thing left to do is to embellish the hat! I used the Mini Tinsel Trim Combo Pack BUT you can use anything you want! Skinny ribbons, rhinestones, pearls, anything goes!
Super simple and way too cute!
Some tips I've learned along the way- when adhering the dome to the metal lid- use the super glue sparingly! Using too much super glue doesn't allow the project to properly dry and it also leaves a nasty residue that you will not be able to get rid of. So use enough to adhere the dome but use it sparingly!
Don't get super glue on your fingers or else you'll stick to your project (don't ask me how I know LOL).
Punch a 2" circle from the 2" Circle Punch and adhere it to the top of the flat lid. This helps hide the silver coloring on the flat lid.
Hot glue the penguin's feet to the center of the white circle on the flat lid. The hot glue helps hold the penguin upright. Use Mini Glue Dots to adhere the Merry Christmas banner to the front of the penguin.
For the snow- you can use either powder snow like I did or you can use polyfill. If you use powder snow like mine- you will need to super glue your flat lid to the inside of your jar ring. Otherwise the snow will fall out of the dome and go all over inside your hot cocoa. If you use the polyfill-it will stay in place but takes up more room in the dome and isn't as fun as polyfill stays in one place where powder snow moves around. Just be sure not to overfill with snow or you will not see your elements.
I hope you will find this information helpful! As always- if you have questions- please feel free to let me know!

No comments:
Post a Comment